
What you want to build
To build said functional web app, you need a web interface (frontend or client) for users to interact with, as well as a server (backend) which does data processing, data storage, and calling the ML/AI models.
(You might have heard of Streamlit. It’s great for the simplest demos, but it really lacks the customizability to make a viable production app)
The dangers of YouTube web development tutorials
As a data scientist, many aspects of software development fill me with trepidation, such as the prospect of wasting days on broken configuration. Nothing is more frustrating than seeing something break and not know why it broke and how to fix it.
As a result, I relied desperately on walkthrough-style tutorials, especially on YouTube, that depicted the entire process, from start to end, of setting up a React project, deploying a backend or website etc.
Looking back, there are two main downsides to this:
Firstly, confusion at multiple conflicting and potentially outdated tutorials (for instance, as newer versions of React come out). This has often led to me following a tutorial until realizing it no longer works.
Secondly, most tutorials are aimed at building cool classroom demos which are beginner-friendly. Hence, they use frameworks and reinforce coding patterns which have a low performance ceiling, which will be lacking for production and scaling. On hindsight, I’ve picked up many bad coding habits from YouTube tutorials, that are now obstacles to further developing my app as a live product serving thousands of users.
Since you learn best from failures, this process, though frustrating, was a massive learning experience for me throughout the year. Hopefully you can save lots of time learning from my failures.
Tip #1: Use Next.js instead of React
Searching for ‘full stack app tutorial’ on YouTube gives you lots of React tutorials.

Many YouTube tutorials advocate for React, and I initially followed suit.
However, eventually I wanted to improve my site’s SEO performance — which is crucial to gaining more users. React’s limitations, such as inability to change meta tags dynamically, and lack of server-side rendering, were frustrating, necessitating a tedious change to Next.js. after switching, the differences in performance were just night-and-day.
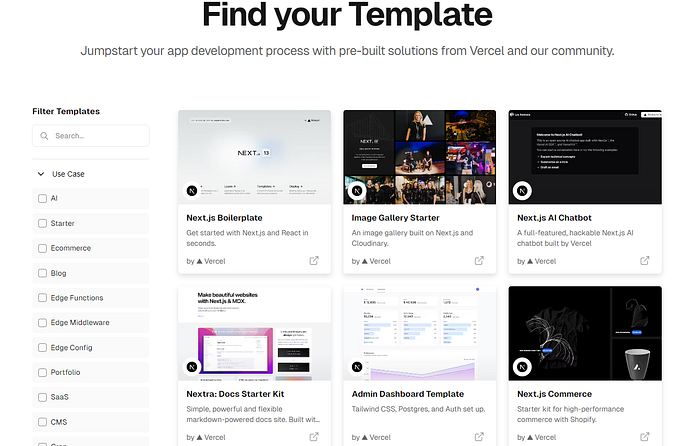
Vercel has lots of Next.js templates for you to jumpstart your web development.
Some people say React is more beginner-friendly, but there are lots of Next.js templates online, for example by Vercel (Next.js creators), especially AI applications. Next.js is really the modern web framework used for nearly every AI application.
Tip #2: Opt for Tailwind CSS instead of Bootstrap for styling
Embarking on my front-end UI journey, I initially, and somewhat naively, followed the herd of frontend tutorials, towards Bootstrap. Its allure? The promise of ease with ready-made components like dropdowns and accordions.

However, after a while, I realized that my website just looked … really ugly, especially when compared to the sleek, modern AI demo pages out there. There was this unmistakable ‘Bootstrap look’ — a sort of aesthetic stubbornness that resisted customization, entangled in a web of confusingly named CSS classes. So eventually, I once again bit the bullet and redid my entire frontend with Tailwind CSS, taking 3 whole days.

If you’ve ever seen an AI demo page with a modern and clean UI, it’s highly likely they used Tailwind CSS.

Initially, I was intimidated by Tailwind — its long component definitions brimming with what seemed like cryptic utility classes appeared anything but beginner-friendly… I thought that Tailwind lacked pre-built components and it would be onerous to memorize the utility classes. However, this couldn’t be more untrue! There are many great UI component libraries built on Tailwind CSS — I used Flowbite React (it has all the components I need!)
The trappings of the data science mindset
As a data science student, I’ve grown to love Python with its minimalist, powerful code syntax. Python’s type-inference spared me the tedium of defining types for every variable (a task I found cumbersome, especially in languages I encountered in intro CS classes like Java).
Hence, I used JavaScript for my frontend and Python for my backend, avoiding defining the types of my API endpoints unless necessary.
However, as my app grew in complexity, tons of unexpected type errors between my frontend and backend eroded my coding productivity. I’m finally understanding my CS friends’ insistence on the importance of explicit types. It turns out, the meticulous detail in type definition isn’t just pedantic — it’s essential.
Tip #3: Choose FastAPI over Flask for your backend, and rigorously define response models
If you search for Python backend tutorials on YouTube, most videos would point you to Flask. Just like how a broken clock is right twice a day, I somehow happened to choose FastAPI as my Python backend, which was definitely correct decision on hindsight.
(Though hilariously, I had totally disregarded the benefit of FastAPI. Until only recently, I didn’t understand the need to define Pydantic classes for POST requests and thought it more of a hassle than a help.)
FastAPI has several game-changing benefits:
- automatically-generated API documentation — this will be very useful for future engineers you onboard (or your future self) to understand the backend structure!
- easier to write code — since FastAPI is built on Json schema, defining routes is much easier and shorter using FastAPI than Flask — resultantly, there’s lower learning curve for newbies like me
- better performance — FastAPI is apparently much faster than Flask and consumes less memory — which is great as my app sends around large payloads

But the most important thing is FastAPI’s type annotations.
- FastAPI is built on Pydantic, a data validation library allowing you to define the ‘shape’ of data as classes with attributes.
- With FastAPI, you can annotate the input and output types for each API route, using Python type hints and Pydantic-defined classes.
This ensures that each route has outputs of a consistent data structure. But to unleash the full power of this feature, we need to…
Tip #4: Use TypeScript instead of JavaScript
For the longest time, I’ve manually written my frontend fetcher methods (once again learning from full-stack tutorials), hence adding new routes to my app was a long and error-prone process.
You can hence imagine my shock when my big-tech SWE friend told me that you can auto-generate Typescript client code using your API specification. (see here for more FastAPI’s documentation, one such package is openapi-typescript-codegen)

In an instant, I realized that this would solve two major challenges simultaneously: removing my manual and error-prone client fetcher writing, and ensuring type consistency between my backend and frontend. This significantly reduced the persistent type errors that were undermining my app’s reliability.
Of course, having type constraints for your backend routes only helps if your frontend enforces those type constraints — which naturally requires TypeScript.
Hence, I’m currently undergoing the arduous process of defining response models for my FastAPI backend, and converting my frontend from JavaScript to TypeScript, a process that you can avoid if you start with FastAPI and TypeScript from the start!
About deployment…
Through my data science / ML classes, I’ve grown used to hopping onto Google Colab, pressing play, and voila, the code runs. So, it’s no surprise that the very thought of deployment fills me with dread. But as the founder of the Buildspace accelerator puts it, you need to “GTFOL” (Get The F Off Localhost) to make your software apps accessible to the world. Hence, I naturally wanted the deployment to be as painless as possible.
Tip #5: Use Modal for GPU backend
If you want to deploy your own models (e.g. ML models, image recognition, Whisper for transcription, or more recently, open-source LLMs like Llama), you will need a GPU cloud provider to host your model.
My advice is to choose Modal and never look back.
Modal stands out with its superb documentation and learning resources, complete with up-to-date sample code for the latest applications — from fine-tuning open-source LLMs to serving LLM chatbots, and more.
I actually started my entire podcast-transcribing app forking Modal’s sample audio-transcription code, and so it isn’t an exaggeration to say that without Modal I wouldn’t have built my app.

Modal shines in its user-friendliness (and coming from someone who loathes deployment, that’s saying a lot). Just write cloud functions on my local code editor, and deploy it using one terminal command. Its dashboard is so user-friendly (especially compared to AWS), allowing me to track my app’s usage, analyze performance, and trace errors very easily.
Last of all, Modal serves as my escape valve when it comes to functionality that Lambda doesn’t have, or is tedious to implement, e.g. file storage (this will come in useful in the next point…) and scheduling functions.
Tip #6: Use AWS Lambda for backend deployment and Vercel for frontend
When hosting my Python backend, I was confused over whether to use Amazon EC2 or AWS Lambda. My app requires the storage of audio files (which could get big), and since Lambda’s serverless architecture isn’t meant to store files (it had 2 GB of ephemeral storage, but it isn’t persistent), I had thought I had to use Amazon EC2. However, EC2 was much more cumbersome to configure, and being an always-on dedicated instance, it would be much more expensive and difficult to scale.
This is where Modal’s free file storage came into the rescue, and I was able to structure my backend to be compatible with Lambda, while downloading and storing files when needed on Modal.
Thankfully, this video was really good, and following their instructions exactly enabled me to successfully deploy my backend.
For my frontend, Vercel was all I needed. The process was hassle-free and, aside from domain name costs, entirely free.
Making life easier
The last 3 miscellaneous tips that would save you from wasting massive amounts of time in development…
Tip #7: don’t build your own landing page using React
Yet another mistake I did because all those full-stack tutorials fooled me into thinking I had to code my own landing page with React. Sure, you can (and I did), but there’s a low ceiling of performance and aesthetics — precisely the important traits you need for a successful landing page.
React is only better for custom functionality like the actual AI app interface. For the landing page with purely static content, you should instead, use no-code site builders like Webflow or Framer to rapidly build landing pages (and outsource landing page creation to your designer so you can work on other things!)
Tip #8: Firebase + Stripe for user authentication and payments
When it comes to user authentication, the number of options and tutorials out there can once again be overwhelming. I needed a solution that not only handled authentication but also integrated with a payment system to control access based on user subscription status.
After spending days trying and failing to use several different authentication solutions e.g. auth0, I found that Stripe + Firebase worked well. Firebase has a Stripe integration that updates users’ subscription status upon successful payment, and Firebase’s React client does client-side authentication, and Python client does server access control well. Following these two videos (here and here) enabled me to successfully implement this on my app.
Tip #9: Implement Sentry for error monitoring
For months, I had no clue what bugs users encountered with my app in production. Only when myself or a user spots a bug, do I comb through AWS Cloudwatch interface to try to find the backend bug.

This continued until my co-founder introduced me to Sentry, a tool for performance monitoring and error tracking of cloud apps. It’s really easy to initialize for your frontend and backend, and you can even integrate it with Slack to get instant error notifications. Just be careful not to deplete your free plan’s monthly error budget on a trivial but frequent error like authentication timeout. That’s what happened to me — and I had to subscribe to the paid plan to find logs for the important bugs I actually wanted to solve.
Bonus Tip #10: don’t try to build a web app using Spotify’s API! I wasted my app for 2 months assuming I could integrate Spotify’s API to allow users to load their saved podcasts. But to productionize this, you need to apply for a quota extension request, which takes more than a month for Spotify to review. And they’ll probably reject the application anyway if your app involves any AI/ML model (despite my app not actually using Spotify data to train any model, the wording that is prohibited in their Developer Policy).
Conclusion
I hope this technical guide demystifies some aspects of web app development for fellow data science enthusiasts.
If you found this post helpful:
- do check out my other Medium articles: how to summarize long texts using AI, generating music using deep learning
- try out my app — Podsmart transcribes and summarizes podcasts and YouTube videos, saving busy intellectuals hours of listening
- follow me on LinkedIn or Twitter/X, and reach out via messages or comments! I’ve love to bounce ideas about all things data science and AI
Thanks for reading!
Enjoyed this article? Sign up for our newsletter to receive regular insights and stay connected.