
Data lakes, business intelligence, operational analytics, and data warehousing share a common core characteristic—the ability to extract, transform, and load (ETL) data for analytics. Since its launch in 2017, AWS Glue has provided serverless data integration service that makes it easy to discover, prepare, and combine data for analytics, machine learning, and application development.
AWS Glue interactive sessions allows programmers to build, test, and run data preparation and analytics applications. Interactive sessions provide access to run fully managed serverless Apache Spark using an on-demand model. AWS Glue interactive sessions also provide advanced users the same Apache Spark engine as AWS Glue 2.0 or AWS Glue 3.0, with built-in cost controls and speed. Additionally, development teams immediately become productive using their existing development tool of choice.
In this post, we walk you through how to use AWS Glue interactive sessions with PyCharm to author AWS Glue jobs.
Solution overview
This post provides a step-by-step walkthrough that builds on the instructions in Getting started with AWS Glue interactive sessions. It guides you through the following steps:
- Create an AWS Identity and Access Management (IAM) policy with limited Amazon Simple Storage Service (Amazon S3) read privileges and associated role for AWS Glue.
- Configure access to a development environment. You can use a desktop computer or an OS running on the AWS Cloud using Amazon Elastic Compute Cloud (Amazon EC2).
- Integrate AWS Glue interactive sessions with an integrated development environments (IDE).
We use the script Validate_Glue_Interactive_Sessions.ipynb for validation, available as a Jupyter notebook.
Prerequisites
You need an AWS account before you proceed. If you don’t have one, refer to How do I create and activate a new AWS account? This guide assumes that you already have installed Python and PyCharm. Python 3.7 or later is the foundational prerequisite.
Create an IAM policy
The first step is to create an IAM policy that limits read access to the S3 bucket s3://awsglue-datasets, which has the AWS Glue public datasets. You use IAM to define the policies and roles for access to AWS Glue.
- On the IAM console, choose Policies in the navigation pane.
- Choose Create policy.
- On the JSON tab, enter the following code:
{ "Version": "2012-10-17", "Statement": [ { "Effect": "Allow", "Action": [ "s3:Get*", "s3:List*", "s3-object-lambda:Get*", "s3-object-lambda:List*" ], "Resource": ["arn:aws:s3:::awsglue-datasets/*"] } ] } - Choose Next: Tags.
- Choose Next: Review.
- For Policy name, enter
glue_interactive_policy_limit_s3. - For Description, enter a description.
- Choose Create policy.

Create an IAM role for AWS Glue
To create a role for AWS Glue with limited Amazon S3 read privileges, complete the following steps:
- On the IAM console, choose Roles in the navigation pane.
- Choose Create role.
- For Trusted entity type, select AWS service.
- For Use cases for other AWS services, choose Glue.
- Choose Next.

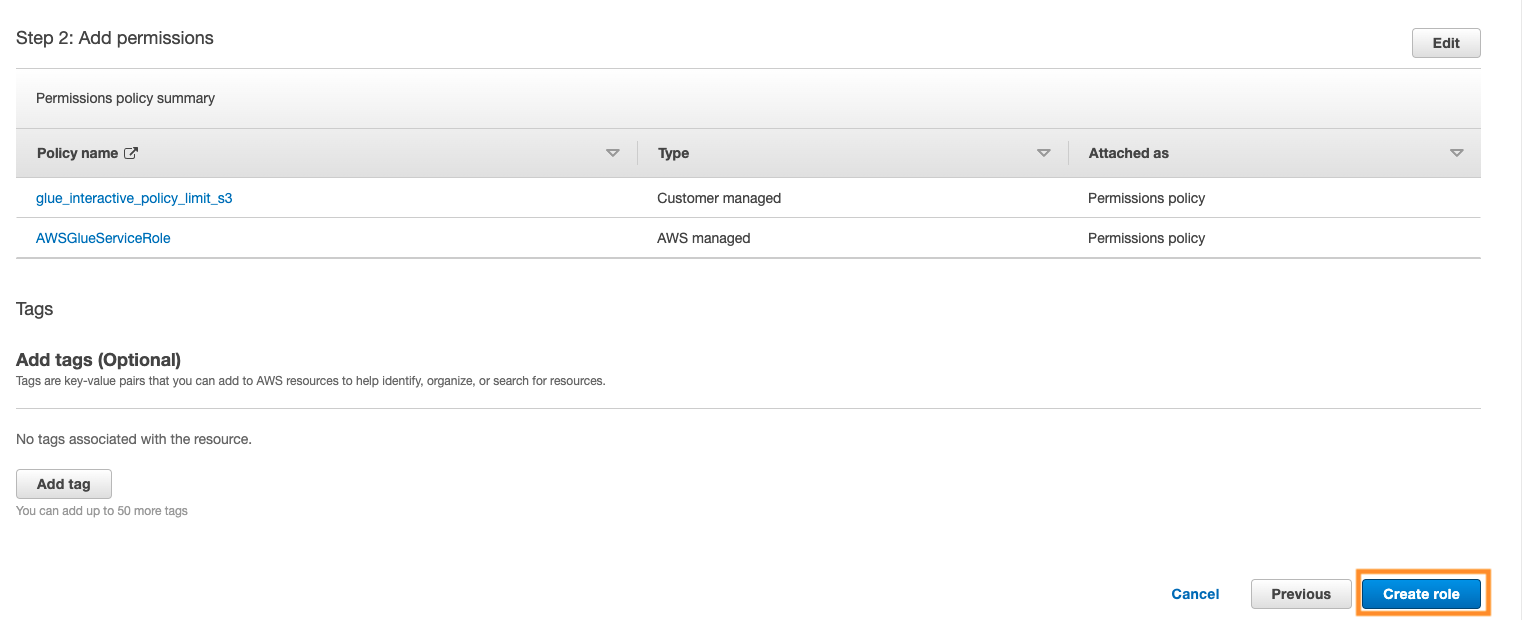
- On the Add permissions page, search and choose the AWS managed permission policies
AWSGlueServiceRoleand glue_interactive_policy_limit_s3. - Choose Next.
- For Role name, enter
glue_interactive_role.

- Choose Create role.
- Note the ARN of the role,
arn:aws:iam::<replacewithaccountID>:role/glue_interactive_role.

Set up development environment access
This secondary level of access configuration needs to occur on the developer’s environment. The development environment can be a desktop computer running Windows or Mac/Linux, or similar operating systems running on the AWS Cloud using Amazon EC2. The following steps walk through each client access configuration. You can select the configuration path that is applicable to your environment.
Set up a desktop computer
To set up a desktop computer, we recommend completing the steps in Getting started with AWS Glue interactive sessions.
Set up an AWS Cloud-based computer with Amazon EC2
This configuration path follows the best practices for providing access to cloud-based resources using IAM roles. For more information, refer to Using an IAM role to grant permissions to applications running on Amazon EC2 instances.
- On the IAM console, choose Roles in the navigation pane.
- Choose Create role.
- For Trusted entity type¸ select AWS service.
- For Common use cases, select EC2.
- Choose Next.

- Add the
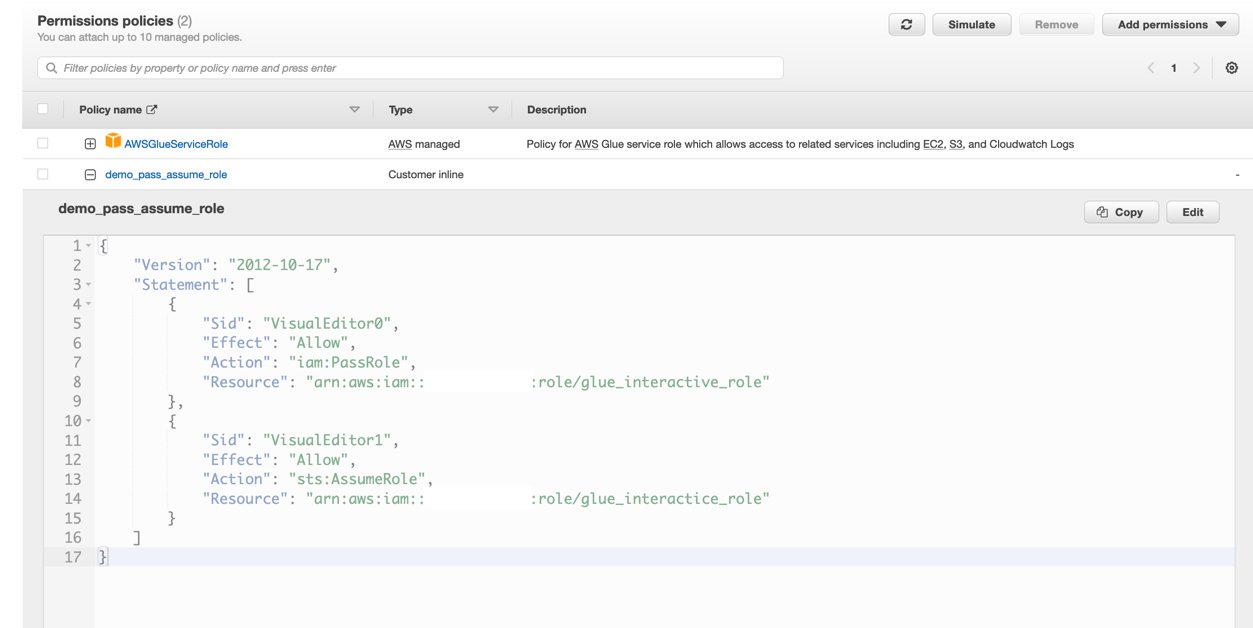
AWSGlueServiceRolepolicy to the newly created role. - On the Add permissions menu, choose Create inline policy.

- Create an inline policy that allows the instance profile role to pass or assume
glue_interactive_roleand save the new role asec2_glue_demo.

Your new policy is now listed under Permissions policies.
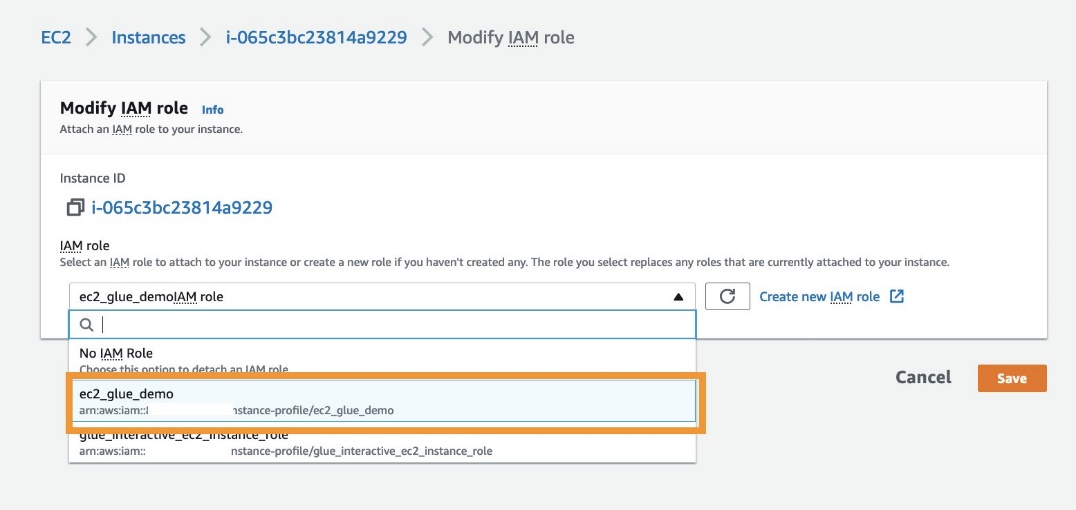
- On the Amazon EC2 console, choose (right-click) the instance you want to attach to the newly created role.
- Choose Security and choose Modify IAM role.

- For IAM role¸ choose the role
ec2_glue_demo. - Choose Save.
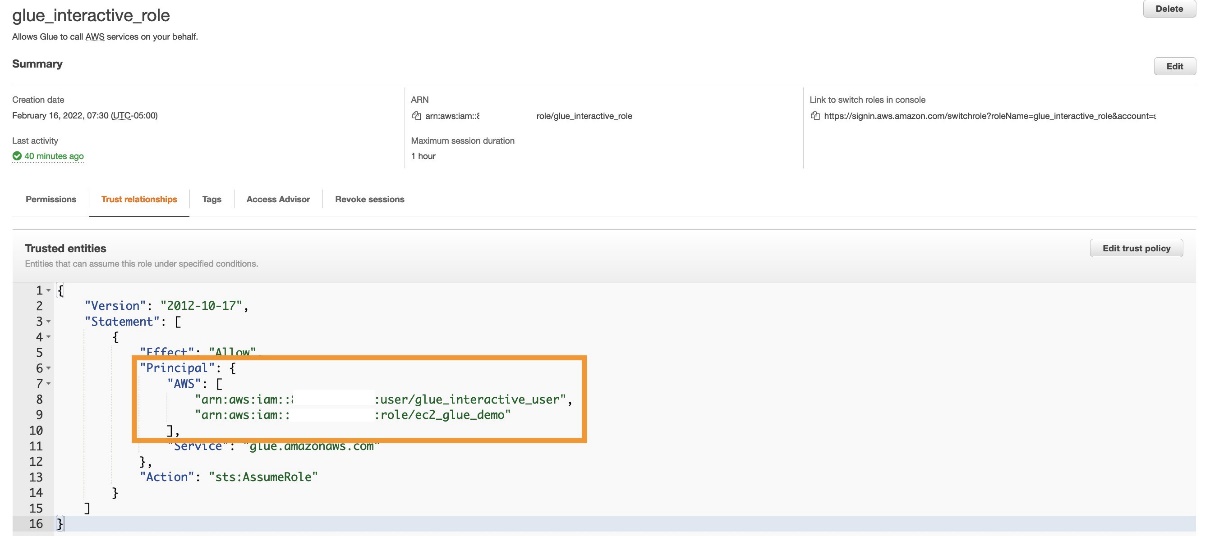
- On the IAM console, open and edit the trust relationship for
glue_interactive_role. - Add
“AWS”: [“arn:aws:iam:::user/glue_interactive_user”,”arn:aws:iam:::role/ec2_glue_demo”]to the principal JSON key.
- Complete the steps detailed in Getting started with AWS Glue interactive sessions.
You don’t need to provide an AWS access key ID or AWS secret access key as part of the remaining steps.
Integrate AWS Glue interactive sessions with an IDE
You’re now ready to set up and validate your PyCharm integration with AWS Glue interactive sessions.
- On the welcome page, choose New Project.
- For Location, enter the location of your project
glue-interactive-demo. - Expand Python Interpreter.
- Select Previously configured interpreter and choose the virtual environment you created earlier.
- Choose Create.
The following screenshot shows the New Project page on a Mac computer. A Windows computer setup will have a relative path beginning with C:\ followed by the PyCharm project location.

- Choose the project (right-click) and on the New menu, choose Jupyter Notebook.

- Name the notebook
Validate_Glue_Interactive_Sessions.
The notebook has a drop-down called Managed Jupyter server: auto-start, which means the Jupyter server automatically starts when any notebook cell is run.
- Run the following code:
print("This notebook will start the local Python kernel")
You can observe that the Jupyter server started running the cell.

- On the Python 3 (ipykernal) drop-down, choose Glue PySpark.

- Run the following code to start a Spark session:
spark - Wait to receive the message that a session ID has been created.

- Run the following code in each cell, which is the boilerplate syntax for AWS Glue:
import sys from awsglue.transforms import * from awsglue.utils import getResolvedOptions from pyspark.context import SparkContext from awsglue.context import GlueContext from awsglue.job import Job glueContext = GlueContext(SparkContext.getOrCreate()) - Read the publicly available Medicare Provider payment data in the AWS Glue data preparation sample document:
medicare_dynamicframe = glueContext.create_dynamic_frame.from_options( 's3', {'paths': ['s3://awsglue-datasets/examples/medicare/Medicare_Hospital_Provider.csv']}, 'csv', {'withHeader': True}) print("Count:",medicare_dynamicframe.count()) medicare_dynamicframe.printSchema() - Change the data type of the provider ID to
longto resolve all incoming data tolong:medicare_res = medicare_dynamicframe.resolveChoice(specs = [('Provider Id','cast:long')]) medicare_res.printSchema() - Display the providers:
medicare_res.toDF().select('Provider Name').show(10,truncate=False)

Clean up
You can run %delete_session which deletes the current session and stops the cluster, and the user stops being charged. Have a look at the AWS Glue interactive sessions magics. Also please remember to delete IAM policy and role once you are done.

Conclusion
In this post, we demonstrated how to configure PyCharm to integrate and work with AWS Glue interactive sessions. The post builds on the steps in Getting started with AWS Glue interactive sessions to enable AWS Glue interactive sessions to work with Jupyter notebooks. We also provided ways to validate and test the functionality of the configuration.
About the Authors
Kunal Ghosh is a Sr. Solutions Architect at AWS. His passion is building efficient and effective solutions on cloud, especially involving analytics, AI, data science, and machine learning. Besides family time, he likes reading and watching movies. He is a foodie.
Sebastian Muah is a Solutions Architect at AWS focused on analytics, AI/ML, and big data. He has over 25 years of experience in information technology and helps customers architect and build highly scalable, performant, and secure cloud-based solutions on AWS. He enjoys cycling and building things around his home.
Enjoyed this article? Sign up for our newsletter to receive regular insights and stay connected.